The Beauty of Natural Dyes
Natural plant dyes can be used on any natural organic fibre. There are two general types of natural fibres: 1) Cellulose or Plant fibres such as cotton, linen, or hemp; and 2) Protein or Animal fibres such as wool or silk. Protein fibres generally take dyes better than cellulose fibres and will tend to have a stronger colour, but you can still get very satisfying colours on cellulose fibres.
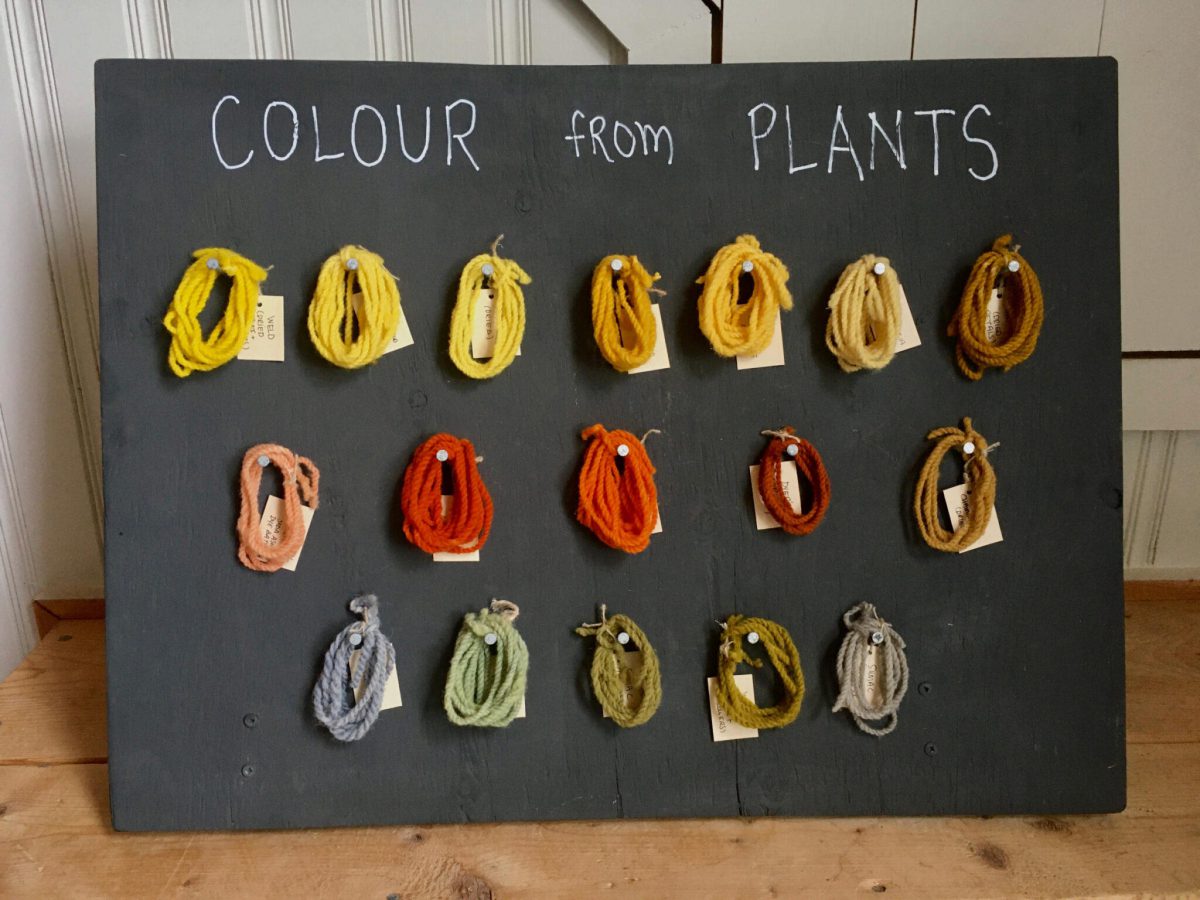
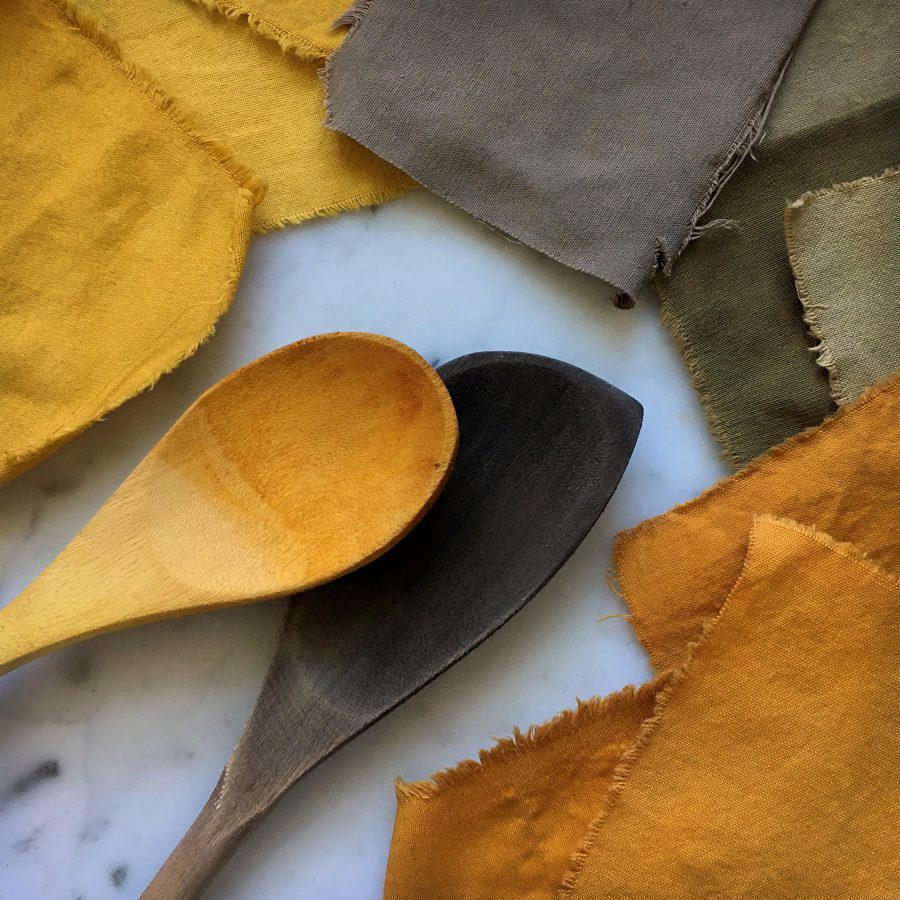
Natural dye colours are more complex than those that are created with synthetic dyes. They tend to take on a deeper, more nuanced colour that almost shimmers in the light. Plant colours have been described as ‘living colour’. They will evolve and wear over time as they are washed, worn, and loved creating colours and garments that are alive, telling the story of their use. While some natural dyes are ‘fugitive’ and will not last, many are lightfast (resist fading) and washfast (don’t wash out) making them altogether quite colourfast. We have selected our lineup of natural dyes to be the most colourfast while offering the widest palette that can be grown locally.
Dyers sometimes marvel at the way the natural colours all seem to ‘go together’. Each dye plant can create a wonderful range of colours depending on how strong the dye is, what mordant is used, what type of material is being dyed, and whether any modifiers are applied to shift the colour. The use of organic fibres like cotton, wool, silk, or linen further adds to the beauty, texture, and harmony of the colours and materials.
There is a wonderful natural cycle to plant dyes that is both beautiful and ecological. The plants grow, they are harvested by hand, steeped in a bath, bonded to a fibre, and, once the dye process is complete, all of the leftover water and plant materials can be returned to the garden where they came from. Because you are dyeing natural materials, they, too, can be composted at the end of their life. This creates a beautiful cycle of soil to soil that is part of the Fibreshed movement – a movement striving to create local fibre communities in a similar way to the local food movement.
View our full Getting Started Guide as a PDF >
Key Concepts
Dyeing fibre with plants is a fairly simple process, but it does involve a number of steps, and requires slowing down to wait while things soak or steep. Generally, preparing a dye is much like making tea: the fresh or dried plant materials are steeped at a gentle simmer until their colour has been released to create the dye bath. Once the colour has been extracted, the plant materials are strained off and the dye bath is ready to use. It is typically brought back up to temperature and the fibre is added until it achieves the desired colour.
Fibres are prepared before dyeing by scouring (washing) and mordanting. Mordants are naturally occurring materials – generally, metal salts – that will help the dye to bind with the fibre. You can dye without a mordant, but the colour will be paler and not as lasting. All fibres benefit from being thoroughly wetted or pre-soaked so that they are best able to absorb the dye evenly.
One of the most important things you will need to know in order to dye fibres is the weight of the fibre you intend to dye. This is known as the ‘WOF’ or sometimes ‘WOG’ which is the weight of (dry) fibre or goods. The amount of mordant and dye you need for your project will be based upon your WOF. You can use a kitchen scale to weigh your dry fibres before beginning your project. For example, Weld has a WOF of 10%. This means that 30g of Weld will dye 300g of fibre a medium shade.
The water source you are using will influence the dye colours and you can use well water, river water, rain water, and even ocean water to further create a dyed fibre that is truly of a particular place, season, and time.
Many dyes are pH-sensitive and their colour will dye differently depending on whether the dye bath is acidic or alkaline. This can be used to deliberately shift certain colours. Dyer’s Coreopsis, for example, will be more yellow-orange when acidic and more coral-pink when alkaline.
To maximize your dye bath, consider dyeing multiple items successively. For example, you can dye one skein of wool a strong colour, and then another skein or more in ever paler colours by using the same dye bath until there is no colour left (also known as an exhausted dye bath). You can also use leftover dye baths to overdye something else that you dyed and maybe were not happy with – allowing you to mix and blend colours for any number of effects.
The final dye colour can be altered with a modifier such as iron. Dipping a dyed fibre in iron water will darken and shift the colour – sometimes quite dramatically. Keep in mind that iron can be harmful to delicate fibres and should be used in the lightest concentration needed to achieve the desired effect.
Taking notes as you go can be invaluable in giving you a reference for recreating colours and remembering quantities and details down the road. It can be helpful to approach natural dyeing with openness and curiosity. It is an often unpredictable medium and embracing surprises can help it to be a more enjoyable and magical process.
Step-by-step guide
Download our Getting Started Guide for a list of supplies, favourite dye resource books, and step-by-step instructions on dyeing both cellulose and protein fibres with natural dyes.
We wish you many happy hours of creating!